Quite many time people have been asking me as how I have done the spring animation or can we animate spring in SolidWorks. The answer is yes and here is the trick. I have used SolidWorks 2007 to show “How to Animate a Spring”.
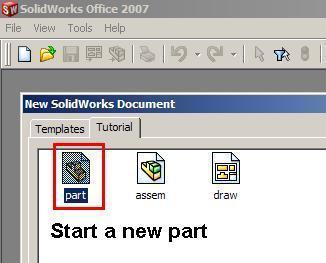
1) Start a new part (can be either mm or inch).
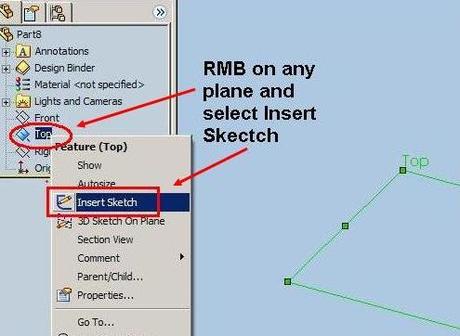
2) RMB on the top plane or any plane and choose “Insert Sketch” from the pop up window. You can also select plane and click “Insert Sketch” from the tool bar or menu.
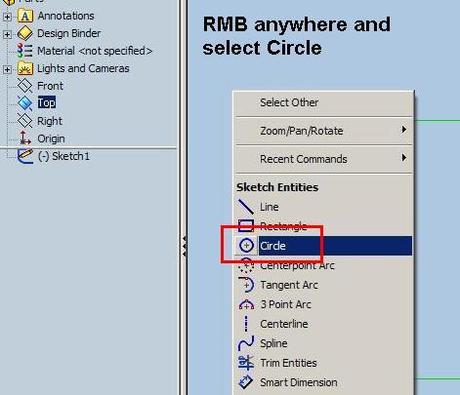
3) RMB anywhere in the graphic area and select circle from the list. You can also select circle from the sketch tool bar or menu.
4) After you have drawn the circle RMB anywhere in the graphic area and select Smart dimension.
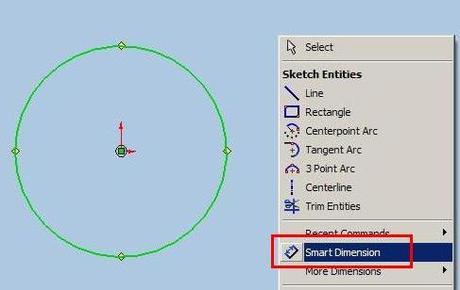
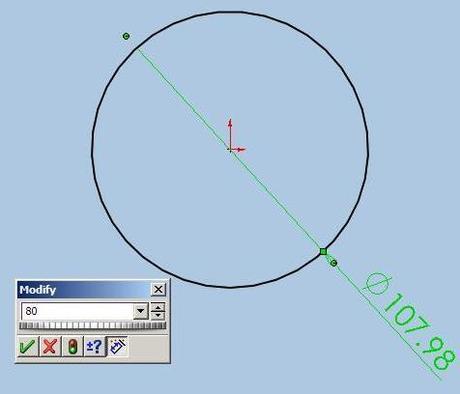
5) Dimension your circle. It is always a good practice to use fully defined sketches. You can give any value, I have used 80mm.
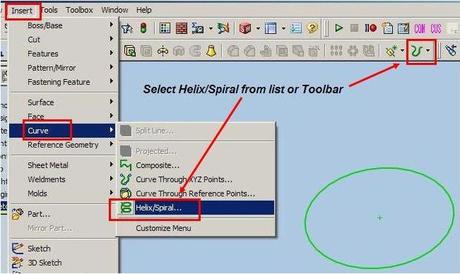
6) Exit sketch. Now with your sketch selected or you can select it later, go to Insert > Curve and select Helix/Spiral. You can select the same from feature toolbar.
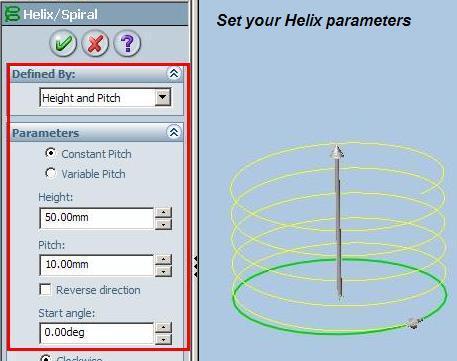
7) Set your parameter in the Helix/Spiral Property Manger. I have used Defined by: Height and Pitch. Parameter: Constant Pitch. Height: 50 mm. Pitch: 10mm and Start Angle: 0 deg.
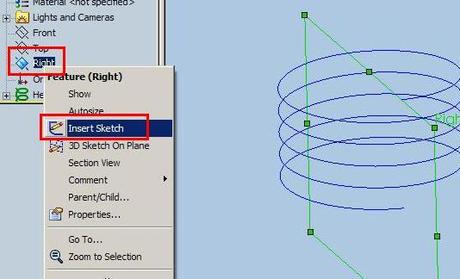
8 ) Click OK and exit the Helix/Spiral command. Now RMB on right plane and select Insert sketch. You can create a new plane if you set any other value to the start angel. Select Plane from the tool bar or from the menu list and then select the Helix or vice versa. In the plane menu select the option “Normal to Curve” if it is not selected by default. Now start a new sketch on the new plane.
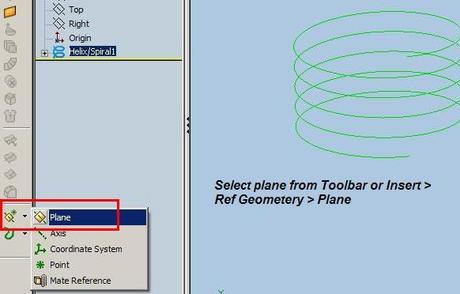
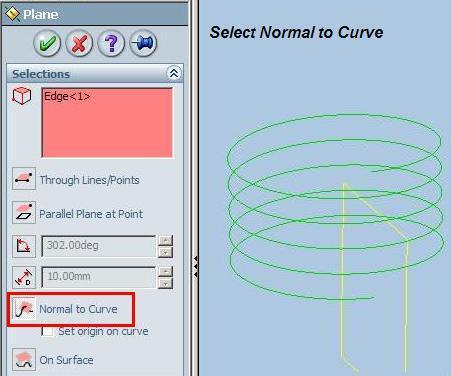
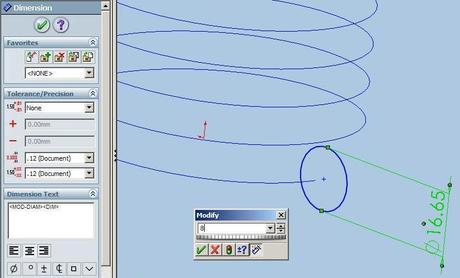
9) Draw a circle and dimension it. I have set the value to 8mm.
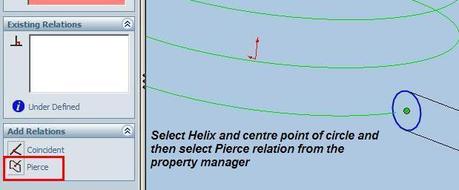
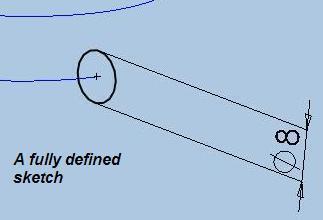
10) Select the center point of the circle and CTRL select the helix i.e. press CTRL for selecting the Helix. In the property manger select the Pierce relation to fully define the sketch. The black color indicates a fully defined sketch.
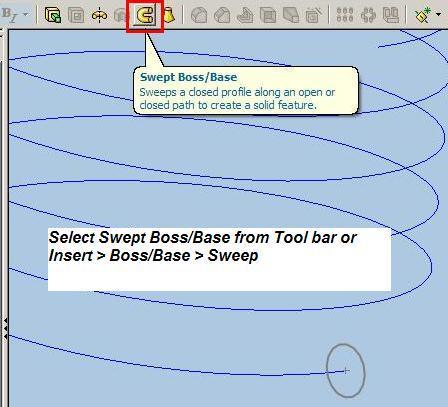
11) Select Swept Bose/Base command from the toolbar or got to Insert > Bose/Base > Sweep.
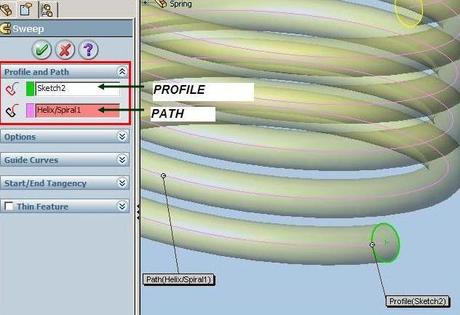
12) In the property manager, select the circle as the profile and helix as the path and click OK. Your spring is ready.
13) Now double click on the spring to see the helix dimensions.
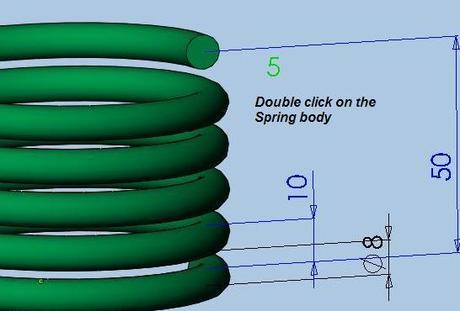
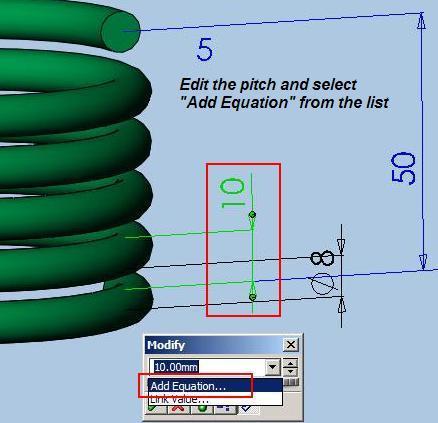
14) Double click on the pitch dimension (10 mm in this case) to edit it. In the pop up window click on the arrow next to dimension and select “Add Equation” from the list.
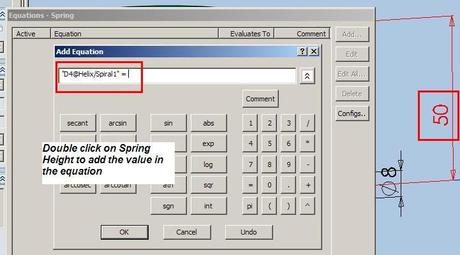
15) You will see the equation manger with pitch dimension (D4@Helix/Spiral1) on the left side followed by = sign. Now click one on the Spring Height (50mm in this case i.e. D3@Helix/Spiral1).
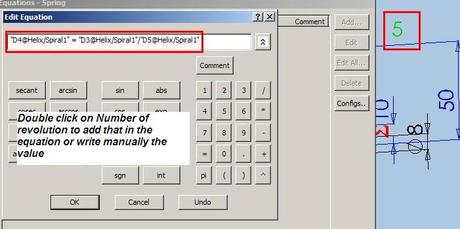
16) After clicking on the Height the equation will look like “D4@Helix/Spiral1” = “D3@Helix/Spiral1”. Put a / after “D3@Helix/Spiral1” and either manually give the number of revolution or select the number of revolution (5 in the case i.e. “D5@Helix/Spiral1”).
17) Try changing the height and do a rebuild. You will see the pitch changing.
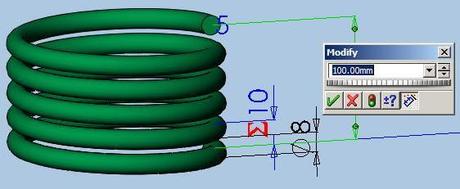
Perfect, you have completed the first/main part for animating the spring. You can now move to How to animate a spring - PART 2.
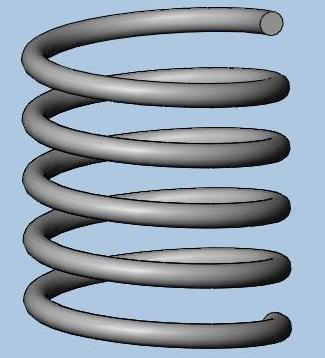
Link for the part: Spring.sldprt
This tips has been submitted by a SolidWorks user. Any comments or feedback? Drop us a comment!
Share and Enjoy:


