> PART 1 - It’s a BMPy road to sharing drawings > PART 2 - Get The WMFOUT of Here! > PART 1 - It’s a BMPy road to sharing drawings >> The Challenge: You have a 2D drawing, and want to show all or part of it to a client or a vendor for their comments or approval. >> The Reality: Not everyone has software that will display the .DWG file format. >> The Solution: Virtually every computer has one or more programs that can open a bitmap (.BMP) file. There are several different ways of exporting a .BMP file from DWGeditor, each with its own advantages and disadvantages. Let’s look at each of them in turn.
PrntScrn – Pressing the PrntScrn button on your keyboard copies an exact duplicate of your current monitor appearance into the Windows Clipboard. Next, start the Windows Paint program. When it opens, click Edit > Paste and it will paste an exact copy of your screen contents into a new Paint document. From there, you can save it to a .BMP file for distribution.
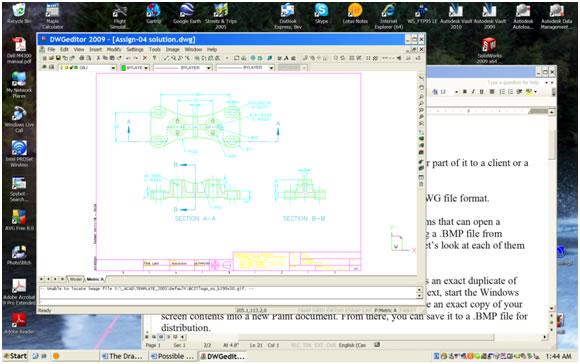
Figure 1: the PrntScrn key captures everything displayed on your monitor
- The disadvantages:
- It copies your entire monitor, including the menu, toolbars, the status bar, and so on from DWGeditor along with the Windows taskbar. If DWGeditor is not running in full-screen mode it will also copy whatever parts of your desktop and other applications that may be showing.
- .BMP files are quite large regardless of how much or how little detail they show. File size is dependent only on image size and color depth.
- The good news:
- Paint, or any other graphics program, can cut or copy a section out of the original screen capture and then paste it into a new, smaller image file. Simply click the Select button, click and drag a suitable window, right-click, and select Cut or Copy from the context menu.
Now click on File > New and then on Edit > Paste to create a new image of the selected region.
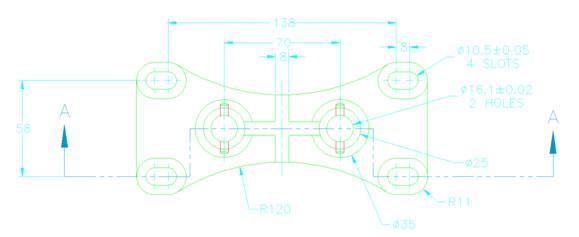
Figure 2: a graphics program such as Paint can cut and save a section out of a screen capture
-
- Paint can Save As images in a variety of different compressed formats. The most common compressed format is .JPG, which is very widely used on the Web. A screen capture of a typical CAD drawing will usually compress over 95% because so much of the image is simply the blank background.
Alt-PrntScrn – if you press and hold down the Alt key and then press the PrntScrn key the effect is almost exactly the same as the previous case. The only difference is that it just captures the current application, and not the entire screen. This is the process that I use to produce the screen shots for these articles.
Export To File… - Select File > Export To File… This brings up the Export Drawing As file dialog box. The Save As Type drop list at the bottom includes Bitmap file (bmp) as one of its options. Supply a file name and click Save.
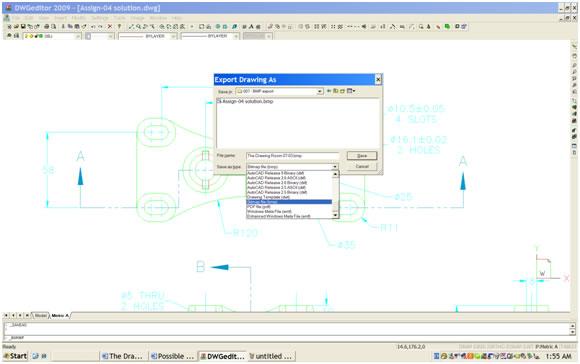
Figure 3: the Export command can save directly to a BMP file
- The good news:
- You are now prompted to select entities. You can thus window or otherwise select entities to be exported directly to the .BMP file. It is not necessary to go through the multiple steps required by the PrntScrn process.
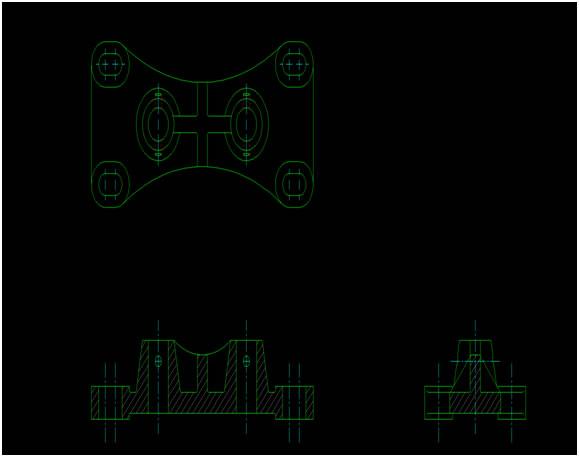
Figure 4: Export can save model space or objects in a paper space layout but not both at the same time
- The bad news:
- All selected objects must exist in the same space. If your main drawing is in model space (the usual practice) while your title block, border, and other annotations are in a paper space layout then you can only export the model space or the paper space objects, but not both at once.
- .BMP is the only raster option, so you may still need to open the file in Paint in order to reduce the file size by saving it as a .JPG.
>> Notes to You: Screen captures are exactly that. They capture exactly what is showing on your screen. This means that the level of detail and the file size depend entirely on the screen resolution. Twice the resolution will give four times the file size.
.BMP and .JPG images can be inserted into other applications, such as Word or Excel. This can have problems, however. For example, screen captures are strictly WYSIWYG (What You See Is What You Get), including the background color. Additional problems and the solution will come in a later tip. Stay tuned!
>> Command review:
- Export
- Keyboard: Export
- Menu: File > Export To File
back to top > PART 2 - Get The WMFOUT of Here! >> The Challenge: You are preparing an important report to a client and to management. You have a 2D drawing, and want to use all or part of it to illustrate the Word document. >> The Reality: The first tip displayed above in PART 1 showed how to capture or save your drawing as a BMP image file.
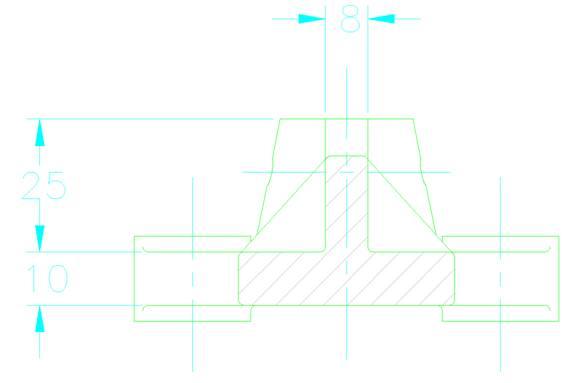
Figure 1: You can capture a bitmap image from your computer screen
The problem is, a .BMP file is a raster image. This means that the image is composed of a series of horizontal rows of different-colored dots. Imagine a printed image that has been fed through a fine paper shredder. If you look at a single strip of paper you won’t see much except for the color changes down its length. If you were to re-assemble the strips in the correct sequence, however, the original image would re-appear. A diagonal line is merely a fortuitous alignment of some of the color dots. You can’t edit the line to change its angle because it doesn’t exist as a line object.
One problem with a raster image is that the only way to zoom in or out is to duplicate or remove scan lines.
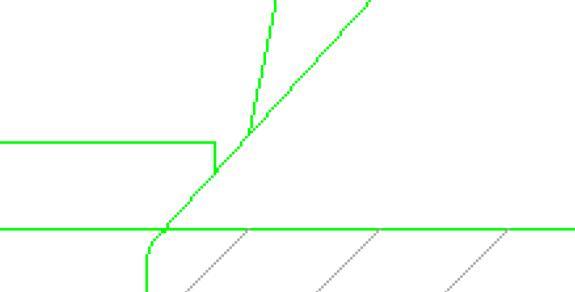
Figure 2: Zooming in to a bitmap does not produced more detail, it just yields a coarser image
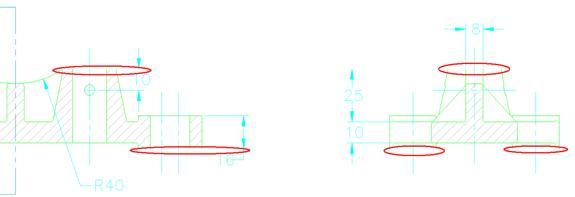
Figure 3: Zooming out of a bitmap can cause details to disappear
The real problem occurs when you insert a raster image into a word processor document or into a spreadsheet. Unless you resort to a lot of trial and error, it is unlikely that the raster image will insert at exactly 100% of its original size. In the worst case, when you scale it up (zoom in) it might happen to delete one or more scan lines that coincidentally contain drawing lines, with potentially disastrous results.
>> The Solution: Unlike a raster scan image such as a BMP file, a CAD file is a vector file. This means that it contains specific data about each entity in the drawing. A line is a Line with specific start and end points, a circle is a Circle with a center and diameter, and so on. This data can be edited.
The vast majority of images used in Windows and on the Web are raster images. Fortunately, Windows also supports a little-known vector file format known as a Windows MetaFile (.WMF). Even more fortunately, DWGeditor is able to produce a .WMF. There are two ways to generate a WMF, but they both end up doing exactly the same thing.
Before you start, zoom and pan in your drawing until the screen shows exactly what you want to export.
Let’s look at the WMFOUT command first. It must be entered at the keyboard, because it doesn’t appear in the menu or on any toolbar. When launched, it produces a fairly standard file dialog box.
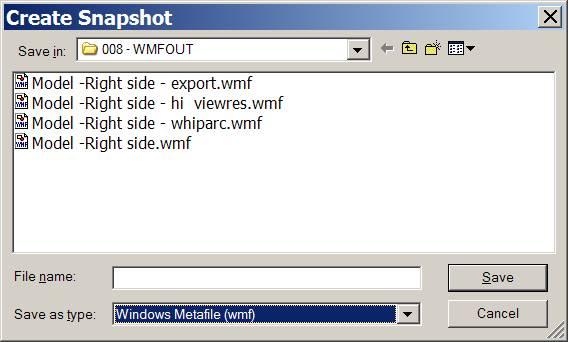
Figure 4: The WMFOUT or Export commands are used to produce a Windows Metafile image
Note: The default Save as type: is an AutoCAD Slide File (sld). This was developed by Autodesk because DOS didn’t have the same sort of screen capture capabilities as Windows does now. It is rarely used these days. You need to select Windows Metafile from the drop list.
Enter a suitable file name, click on Save, and you are done.
As indicated earlier, you can accomplish the exact same thing by using the Export command and then selecting Windows Meta File from the Save as type drop list.
You now have a vector file that can be imported into any Microsoft Office application and into many other programs as well. Being a vector file, it is scalable up and down to fit the destination document without anything getting thicker or going missing. There is no need to show sample figures here because they would look almost exactly like your DWGeditor screen.
>> Notes to You: Unfortunately, the .WMF file format contains nothing but line segments. This means that circles, arcs, splines, curve-fit polylines, ellipses, and curved portions of text all get broken down into small straight-line segments. If you zoom in too far then you will begin to see jaggies and staircasing on curved segments. You may need to do play with DWGeditor’s ViewRes setting to get optimum results.

Figure 5: A WMF file just contains straight-line vectors
Another limitation of a .WMF file is the same one found in exporting to a .BMP file; it only exports objects in the current space.
Even with these limitations, .WMF is still far ahead of .BMP when it comes to inserting drawing portions into another document.
>> Command review:
- WMFout:
Keyboard: wmfout
Alias: WO
- Export:
Keyboard: export
Menu: File > Export to file…
- ViewRes

